We Are Repairing Company In Los Angle
Our experienced team offers services for both residential and commercial properties. With over 25 years of experience in the industry, we boast all of the knowledge and expertise in repairing.

Our experienced team offers services for both residential and commercial properties. With over 25 years of experience in the industry, we boast all of the knowledge and expertise in repairing.
Working Hours : Monday to Sunday (7am - 7pm)
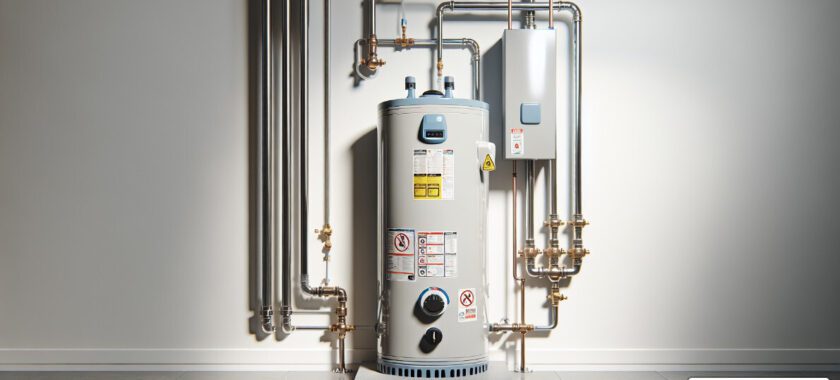
Are you considering installing a gas hot water heater in your property, but unsure about how to approach the process?
Having a functional and properly installed gas hot water heater is vital to maintain a comfortable and efficient household or commercial property. A well-installed gas hot water heater ensures consistent hot water supply, efficient energy consumption, and increased safety.
Here are some fundamental points related to a gas hot water heater installation:
While knowing these steps is informative, it’s not advisable to do a gas heater installation by yourself unless you’re experienced with working with natural gas and local installation codes.
At Sanz Plumbing, we are dedicated to not only helping you understand the essentials of gas water heater installation but also providing proper installation services to ensure your household or commercial property enjoys consistent hot water supply, optimal energy efficiency, and enhanced safety. We bring to the table over 25 years of rich experience in handling both residential and commercial plumbing needs.

Our next sections will take you through the detailed steps of installing a gas hot water heater and provide insights into when it’s best to get professionals involved in the process. Stay tuned to learn more.
Before diving into how to install a gas hot water heater, determine whether your current water heater genuinely needs replacement. This evaluation involves a quick maintenance assessment. Signs indicating the need for a new water heater could include frequent leaks, inconsistent hot water, or the water heater has exceeded its lifespan, which is typically around 10 to 15 years.
Installing a new water heater when it’s not necessary could lead to unnecessary expenses and effort. If you’re unsure about the need for a replacement, consider scheduling an inspection with a professional plumber to guide your decision.
Adherence to local building codes is a critical aspect of any installation project, including water heaters. These codes ensure the safety and efficiency of your plumbing systems. Non-compliance can lead to fines, insurance complications, and potential safety hazards.
Building codes vary by location and can cover aspects such as proper venting, the need for a drain pan, and the requirement of certain safety features. To access these regulations, you can check with your local government office or online resources.
At Sanz Plumbing, we ensure all our installations comply with local building codes. We handle the process of securing necessary permits, so you don’t have to worry about these technical aspects.
In the next section, we’ll walk you through the preparation for the installation, including how to check the water pressure in your home and the importance of installing an expansion tank.
Before we dive into the actual process of how to install a gas hot water heater, it’s crucial to prepare your home for the installation. This includes checking the water pressure in your home and installing an expansion tank if necessary.
One of the first things to do before installing a new gas water heater is to check your home’s water pressure. This is important because reduced pressure can extend the life of your plumbing and appliances by lessening stress on the plumbing lines.
Here’s a simple way to check your water pressure:
Ideally, your water pressure should be between 40-60 psi (pounds per square inch). If the pressure is too high, it can cause damage to your pipes and appliances. In case the pressure is too low, it can affect the efficiency of your new water heater.
An inline pressure gauge is a handy tool for monitoring your home’s water pressure. It provides a clear, instant reading of the water pressure, allowing you to keep an eye on it and take action if necessary.

Next, consider installing a thermal expansion tank. Why? When water is heated, it expands, creating additional pressure in your plumbing system. An expansion tank absorbs this extra water volume, thereby reducing stress on your plumbing lines and extending the life of your appliances and fixtures.
Here are the basic steps for installing an expansion tank:
While these steps sound simple, working with plumbing lines can be complex. If you’re not confident about doing it yourself, it’s best to leave it to professionals like us at Sanz Plumbing.
Now that you’ve prepared your home, you’re ready for the next step: removing the old gas water heater. We’ll cover that in the next section.
Just like preparing your home for the installation of a new water heater, removing the old unit is a task that should be approached with care and precision. This step involves working with gas and water connections, so safety should always be your top priority.
Before you start, make sure that the gas supply is shut off. In addition, if the tank is still hot or under pressure, let it cool down and depressurize before proceeding.
Use a garden hose to drain the tank before you disconnect it. If the water in the tank is still hot, be sure to use a hose that can withstand the heat. As you drain the tank, direct the water to a suitable place, such as a floor drain, sink in the basement, or an appropriate spot outside.
After taking the necessary safety precautions, you can proceed to disconnect the gas and water lines from the old water heater. Here’s how:
Disconnect the gas line: After confirming that the gas supply is shut off, use two pipe wrenches to disconnect the gas line. Depending on the type of gas supply line you have, you’ll disconnect at the union fitting (for black iron pipe) or at the flare fitting (for flexible pipe).
Disconnect the water lines: Use two adjustable wrenches or pipe wrenches to disconnect the water lines above the tank. If the piping has been soldered into place, cut the pipe with a tubing cutter, prepping the pipe with a sanding cloth before cutting.
Remove any gas piping: Detach any gas piping attached to the old water heater’s gas valve. If the supply here is made of black iron pipe, keep the tank tee and sediment trap intact for re-use later.
Remove the overflow pipe and pressure release valve: You’ll reinstall these later on the new unit.
Detach the gas exhaust: This vent removes harmful combustion gases, so it’s crucial to handle it with care. Remove the screws connecting the vent pipe to the water heater, leaving the old venting in place.
Remove the old water heater: Be prepared for it to be heavier than a new one due to sediment buildup over time. You might need help and an appliance dolly for this.
Dispose of the old water heater properly: Check with your local sanitation or recycling company for instructions. If you’re working with professionals like us at Sanz Plumbing, we’ll take care of this for you.
Clean the floor: Once the old water heater is out of the way, clean the floor where it stood.
This might seem like a lot, but with careful planning and execution, it’s a manageable task. However, if you’re not comfortable handling gas and water lines, or if local codes require a licensed professional, don’t hesitate to reach out to us at Sanz Plumbing. We’re here to ensure your gas water heater installation is done safely and correctly.
With the old unit out of the way, let’s get into the meat of the matter – installing the new gas hot water heater. Here’s how to install a gas hot water heater with simple yet detailed instructions.
First, position the new water heater in the drain pan. Using a gas water heater flexible hose kit, connect the gas supply line to the heater. Apply plumber’s tape for use on gas lines (yellow) to all threaded connections to ensure a leak-free seal. Secure the vent pipe to the heater’s vent hood.
Next, connect the water lines. Use plumber’s tape for use on water lines on the threaded ends of the hot and cold water connections. Attach the discharge pipe to the temperature and pressure relief valve.
Now, it’s time to fill the tank. Turn on the water supply and open a hot water faucet in the house to purge air from the lines. Once water flows from the faucet, the tank is full.
Water heaters are hefty, so don’t hesitate to ask for help when moving the appliance. And always follow all the manufacturer’s instructions and local building codes.
Safety should always be a priority. Even with the temperature gauge set to a safe range, scalds are still a concern. This is where thermostatic mixing valves come into play.
Installed at the point-of-use faucet, fixture, or appliance, a thermostatic mixing valve controls both the volume and temperature of water. It does this by attaching to both the hot and cold water supply. The settings may be adjusted inside the valve itself to provide optimum comfort.
Thermostatic mixing valves are especially useful in households with children, older people, and those with sensitive skin. By controlling the water temperature, these valves help to prevent accidental burns, making your hot water usage safer.
As professionals in the field, we at Sanz Plumbing highly recommend the use of thermostatic mixing valves. They add an extra layer of safety and peace of mind to your hot water system.
In the next section, we’ll guide you through the process of testing your new installation to ensure everything is functioning as it should be.
Once you’ve successfully installed the new gas hot water heater, it’s crucial to test the installation. This ensures that the new gas line is adequately airtight and the system functions effectively. Safety is paramount when dealing with gas installations.
Testing your new gas line is a simple process, but it requires attention to detail. Here’s a step-by-step guide on how to do it:
Turn on the water supply: Open the water valve at the tank to fill it with new water. Turn on one or more hot water faucets to bleed air out of the system.
Open the gas supply valve: As the tank fills, carefully open the gas supply valve.
Check for leaks: Using a gas leak detection solution, or a homemade solution of dish soap and water in a one to one ratio, check for bubbles on the new fittings. If there’s a leak, bubbles will form on the surface.
Test all connections: Apply the solution to all the connections to make sure there are no leaks.
If you spot any leaks, this means the gas line is not adequately airtight.
If you notice any bubbles forming during the gas leak test, don’t panic. This indicates a leak in the gas line connections. Here’s what you need to do:
Tighten or refit the joint: If there’s a leak, you’ll need to tighten or refit the joint.
Re-test the gas line: After making adjustments, repeat the testing process to ensure the issue has been resolved.
Contact a professional: If the installation still shows signs of leaks, it’s time to call in the professionals. At Sanz Plumbing, we have the expertise to quickly diagnose and fix any issues with your gas water heater installation.
Working with gas can be dangerous if not done correctly. If you’re unsure about any part of the installation or testing process, or if you encounter complications, it’s always safer to reach out to our team at Sanz Plumbing. We’re always ready to help ensure your gas hot water heater is installed correctly and safely.
While the process of installing a gas hot water heater can be broken down into simple steps, attempting a self-installation comes with several risks.
Gas water heaters involve working with natural gas, a potentially dangerous substance if not handled correctly. One mistake or oversight can lead to gas leaks, causing potential health hazards, fires, or explosions.
Moreover, improper installation can affect the efficiency and lifespan of your heater. This not only leads to higher energy consumption but also frequent repairs or an early replacement, adding to your overall costs.
Lastly, local building codes often require professional installation and inspections for gas water heaters. DIY installation might not comply with these regulations and could lead to legal issues, fines, or problems with insurance claims.
Given the potential risks and complications, consider hiring a professional for your gas hot water heater installation.
At Sanz Plumbing, we have over 25 years of experience in the industry, equipped with the necessary skills and knowledge. Our licensed professionals ensure that your gas hot water heater is installed correctly and safely, adhering to local building codes and manufacturer guidelines.
We handle all the intricate details – from assessing your heating requirements to connecting the gas line and testing the installation. We also remove your old water heater and clean up after the job, saving you time and hassle.
By choosing us, you ensure that your heater operates at optimum efficiency, reducing energy consumption and extending its lifespan. In the event of any unexpected issues, we provide prompt and effective repairs, minimizing disruptions to your daily routine.
Moreover, we offer scheduled maintenance programs, allowing us to detect and address potential issues early, thus reducing the risk of sudden breakdowns and expensive repairs.
In conclusion, while learning how to install a gas hot water heater can be informative, it’s best to leave the actual installation to professionals like us at Sanz Plumbing. This not only ensures your safety and peace of mind but also the efficient and long-lasting operation of your gas hot water heater.
It’s not just about installing a heater; it’s about ensuring it’s done right for your safety and comfort.
To wrap things up, let’s quickly go over the steps we’ve discussed on how to install a gas hot water heater:
Proper installation of a gas hot water heater is not just a matter of convenience, but a matter of safety as well. The process involves handling natural gas and hot water, both of which can pose serious risks if not handled correctly. While we’ve provided these steps for informational purposes, we strongly recommend hiring a licensed professional, like us at Sanz Plumbing, for this process.
By entrusting the job to a professional, you can ensure the installation is done correctly, efficiently, and safely. You’ll also have the peace of mind knowing that your heater will be installed in compliance with local codes, and you’ll avoid potential problems down the road.
If you’re considering a new gas hot water heater installation, please don’t hesitate to contact us. We offer comprehensive water heater services, including installation, repair, and maintenance. We are committed to providing top-quality service to our clients, ensuring your gas water heater provides reliable service for years to come.
It’s not just about getting the job done, but getting it done right!

For more tips and insights on home maintenance and improvement, be sure to check out our blog.

Leave a Reply